Product updates for August'22
See what we’ve been working on in August. Explore important new features like Google Analytics 4 export and find out about updates in Reporting and Conversion Management.
Sophie RennEditorial Lead
|September 8, 2022|5 min read
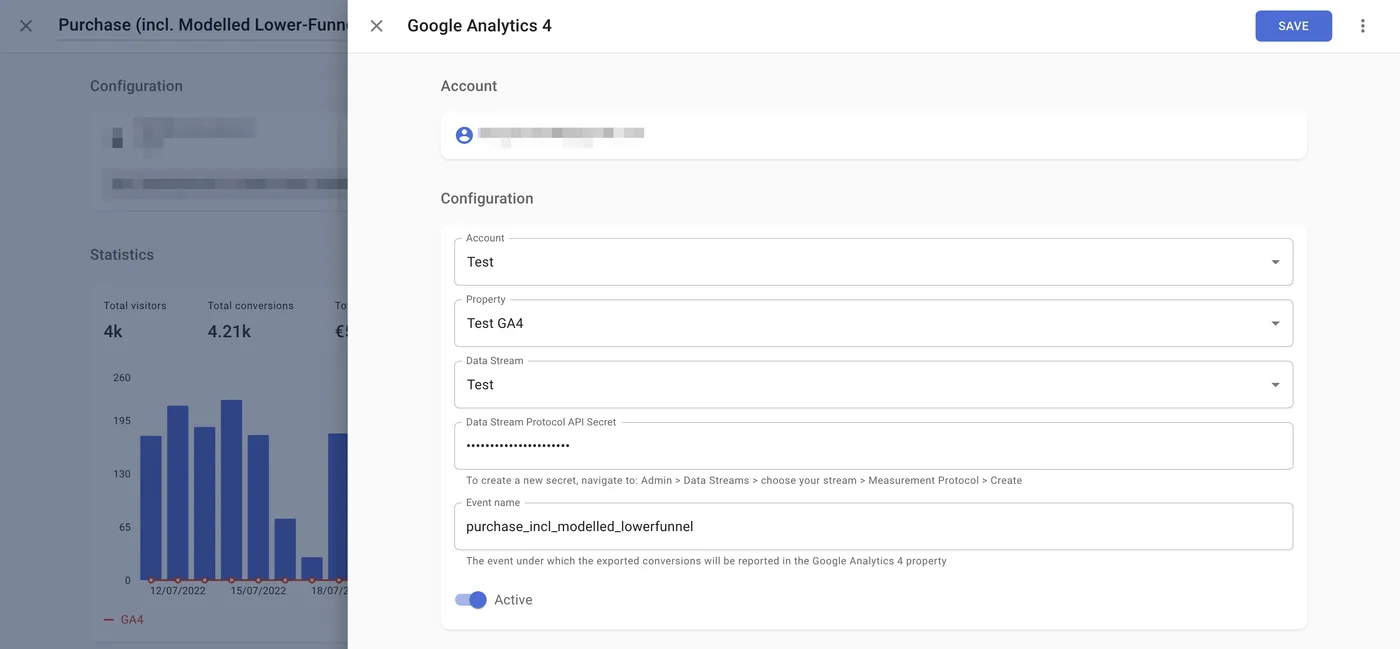
1. Google Analytics 4 export
Users can now export conversions to Google Analytics 4.
How does it work?
Users can export Modelled conversions to Google Analytics 4 for building custom audiences.
Step-by-step guide:
- Click on the “Conversions” section of the navigation bar on the top and select a Modelled Conversion which you’d like to create a custom audience from.
- In the conversion menu, click Add Export.
- Select Google Analytics 4 in the window that opens and go through the authentication flow.
- After completing the authentication, you will see Google Analytics 4 export settings.
- Select your Account, Property and Data Stream.
- Enter your Measurement protocol API secret. To create a new secret, select your Google Analytics 4 property and navigate to: Admin > Data Streams > choose your stream > Measurement Protocol > Create.
- The Event Name field is prefilled with the conversion name within the SegmentStream platform, transformed to the recommended snake_case GA4 naming convention.
- Click Save.
Conversions will be automatically exported to Google Analytics daily after data processing for the previous day is completed.
ℹ️ It might take up to 12 hours before you see the first batch of events from SegmentStream.
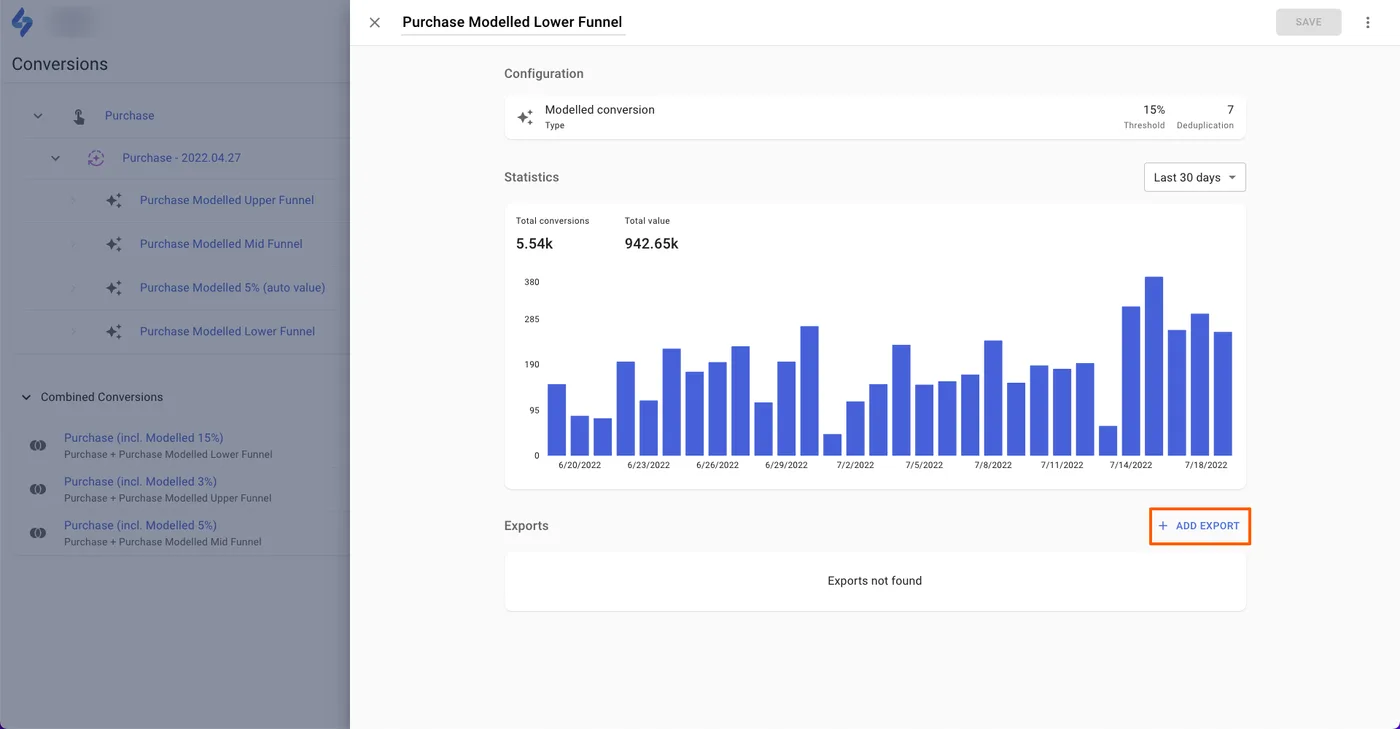
2. A time-saving improvement to the Conversion Export
We made Conversion export better. Now users can easily switch the conversion used by a conversion export.
What is Conversion export?
With SegmentStream you can export Modelled Conversions to ad platforms to ensure their better optimisation.
For example, you can set up an export of Purchase Modelled Upper-Funnel (sessions with high purchase probability within the nearest future). These conversions can be sent to Google Ads and used for optimising upper-funnel campaigns, for example.
How did it work before?
Before to switch the conversion export from one conversion to another, the export within the previous conversion had to be deleted, and a new export had to be created within the new one.
This resulted in the loss of export statistics each time a switch was made, in addition to requiring the user to set up the configuration of the new export manually.
How does it work now?
- A user clicks the “Conversions” section on the top navigation bar.
- Chooses a conversion and scrolls down to the export.
- Clicks on the three-dot menu and selects “Change conversion”.
- Selects the conversion that want to move the export to.
- After clicking “Save” the export will appear in the chosen conversion, and be removed from the previous conversion.
ℹ️ Export history is not affected by the conversion switch, and is preserved in the logs of the new conversion.
Starting from the next scheduled data processing, the export will be sending data from the new conversion.
3. Create conversions easier with presets
Now instead of going through a number of settings, a user can create a Simple Conversion out of a preset.
There are two of them available:
- A Purchase preset for the purchase event (e-commerce businesses).
- A Custom event for lead-generation business and specific conversions.
Also, for the Custom event, users can now set the manual value in order to use Maximise conversion value bidding strategy, for example.
How did it work before?
Previously, creating and tuning a Simple Conversion was challenging for not tech-savvy users. They had to select the deduplication dimension from several options, define deduplication window, conversion value, etc.
How does it work now?
To simplify the flow, we’ve introduced two conversion event types:
- Purchase for e-commerce businesses with standard purchase event settings.
- Custom event with wider tuning options and possibility so set a manual value for the conversion.
Here’s a step-by-step guide to create a conversion with Purchase event type:
- Go to Conversions → New → Simple conversion.
- Select conversion data source.
- Select conversion event type: Purchase.
- Add filter conditions (optional).
- Add description (optional).
- Click Save.
How to create a Simple conversion using Purchase preset
A detailed guide for a Custom event type conversion:
- Go to Conversions → New → Simple conversion.
- Select conversion data source.
- Select conversion event type: Custom event.
- Add filter conditions. At least one condition is required.
- Select conversion value: event value, manual value, no value.
- Switch on deduplication and define deduplication window (optional).
- Add description (optional).
- Click Save.
How to create a Simple conversion using Custom event preset
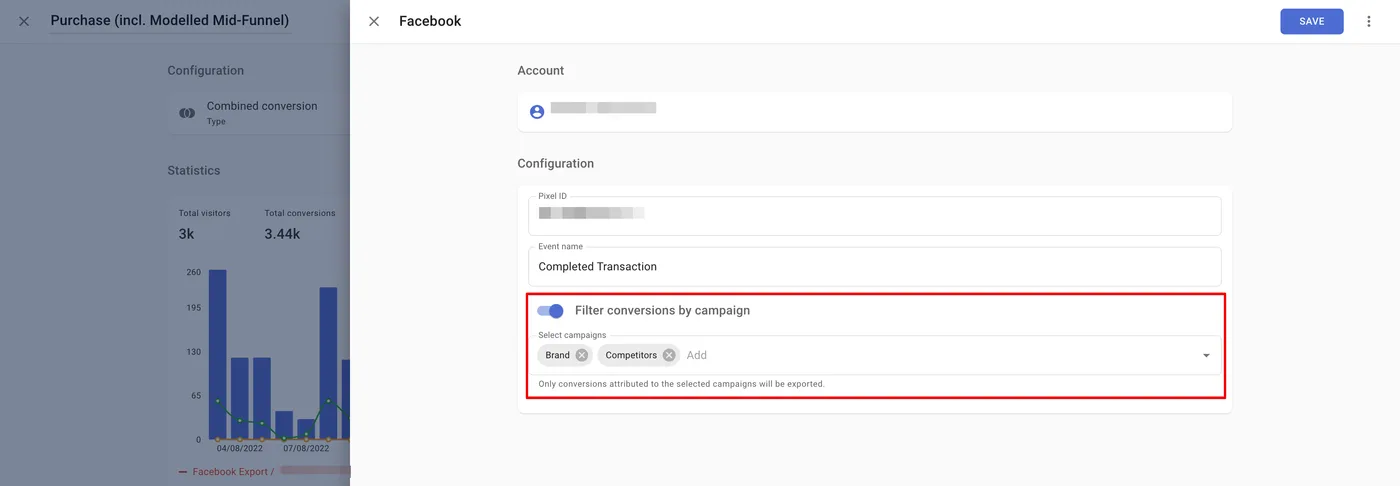
4. SegmentStream’s optimisation on Facebook just got easier
Measure the effectiveness of optimisation based on Modelled Conversions in Facebook within a particular campaign.
How did it work before?
Due to Meta’s Aggregated Event Measurement limitations, there was no foolproof way to test SegmentStream’s optimisation within just one campaign without influencing all campaigns within the account.
How does it work now?
Now users can leverage SegmentStream’s optimisation based on a particular Facebook campaign by applying a campaign filter on the conversion export.
Step-by-step guide
ℹ️ Make sure you connect your Facebook data source and data for at least 1 day has been loaded before you use the “Filter conversions by campaign” feature.
- Navigate to your Facebook export or create a new Facebook export.
- Enable the “Filter conversions by campaign” toggle.
- Select the campaigns which you want to be optimised with the SegmentStream exported conversions.
- Click “Save”.
- Conversions will be automatically exported to Facebook daily, after data processing for the previous day is completed.